Build a Worm Bin (Vermicomposting)
Interstate Commission on the Potomac River Basin
What is a Worm Bin?
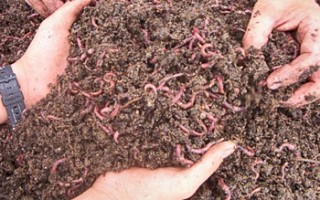
A worm bin is a structure designed to create compost using worms. Vermicomposting, or worm composting, is different than traditional composting. Worm composting is a process that uses red earthworms, also commonly called red worms, to consume organic waste, producing castings (an odor-free compost product for use as mulch), soil conditioner, and topsoil additive. Naturally occurring organisms, such as bacteria and millipedes, also assist in the aerobic degradation of the organic material.
Vermicomposting is especially useful for processing food scraps, since the worms consume the material quickly and there are fewer problems with odor. Worm composting does not generate temperatures high enough to kill pathogens. For this reason, vermicomposting is more appropriate for food, paper, and yard waste.
Why Should I Create a Worm Bin?
Yard and food waste make up a major component of solid waste in most municipalities throughout the United States. Although much of this organic waste can be recycled in the backyard using traditional aerobic backyard composting techniques, these techniques are not appropriate for apartment dwellers and are often inconvenient, particularly during bad weather in the winter. Additionally, many municipalities prefer that food wastes NOT be composted in the backyard compost pile in order to cut down on problems with odors and pests.
Vermicomposting, is an excellent technique for recycling food waste in the apartment as well as composting yard wastes in the backyard. Finished vermicompost can be used in potting soil mixes for house plants and as a top dressing for lawns. Screened vermicompost combined with potting soil mixes make an excellent medium for starting young seedlings. Vermicompost also makes an excellent mulch and soil conditioner for the home garden. In short – creating a worm bin for compost saves you money on top soil, potting soil, and fertilizers and saves your municipality money on landfill costs.
In terms of ease of composting, nothing tops vermicomposting. Worms can compost garbage faster than any other type of composting method. Each day a worm eats half its weight in food. Furthermore, it take far less effort to care for your worm bin than to maintain an outdoor compost pile.
In terms of helping the environment, using compost rather than chemical fertilizers helps grow a healthy, sustainable garden – recycle nutrients and organic matter that help grow trouble-free plants with less water, fertilizer or pesticides. It also builds healthy soil that reduces watering needs and absorbs runoff, protecting streams from erosion and pollution.
Developing Your Goals and Budget
Creating a worm bin is not very expensive, however the costs can add up if you are trying to create many of them! Your goals for creating worm bins will in part determine the costs of their creation.
Goals
You may be building worm bins just for the members of your organization, or for a local school, or you may be reaching out to a specific audience such as homeowners in your watershed. Whatever the case, you will want to write out your specific goals and let them guide your work plan.
Some example goals:
- Create community stewards by showing homeowners simple methods that reduce their impact on their local stream
- Foster environmental stewardship and an interest in science by students of a local school
- Reduce the amount of food and yard waste going to the local landfill
Budget
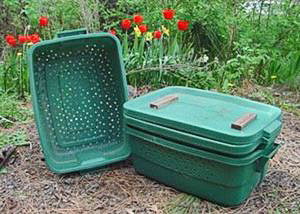
Worm bins come in two varieties—home-built or purchased. It goes without saying that store-bought worm bins are more expensive. In most cases it makes more sense to make a worm bin that suits your needs rather than purchasing one that may not be ideal.
The cost of building a worm bin is quite low, however it varies depending on the materials used and the size of the bin created. In general the cost of the tools used in creating a worm bin is greater than the cost of a worm bin itself.
We will provide instructions for building two types of low-cost worm bins, however there are many other designs available. Use the links that we provide to find the version that is right for your needs and your budget.
Financing
There are many ways to finance a worm bin project. The simplest method of cost cutting is to cut material costs by using leftover lumber. You can also partner with a lumber yard to get new or scrap lumber donated.
As previously noted, tools are the primary cost of building worm bins. You can cut these costs by asking members of your organization or friends to lend you their tools for the project. You can also ask your local high school wood shop class if they would be willing to donate their time to help prepare the worm bins.
If you are in need of funding for your project, you can also ask the recipients of the worm bins to make a donation or you can seek out grants. The Home Depot and Walmart offer grants for community environmental projects such as these. You might also try the Chesapeake Bay Trust (MD) and the Chesapeake Bay Restoration Fund (VA) or other environmental grant making organizations in your jurisdiction.
Steps for Creating a Worm Bin
Below is a sample timeline for a worm bin project where individuals will be building their own bins and the materials and tools will be provided by your organization:
- Determine the target audience for the worm bin construction
- Order materials from supplier
- Arrange for a location to store and build the worm bins
- Arrange for materials to be delivered or to pick up the materials (NOTE: this may be an additional cost)
- Purchase or arrange to borrow needed tools
- Advertise the worm bin construction day through as many outlets as possible
- Create and print steward’s manual/educational materials
- Host worm bin construction day
- Arrange site visits to make sure that the worm bins are functioning properly and answer any questions that the bin owners might have
- Call worm bin owners to remind them to clean out their worm bins to instill good maintenance habits
Advertising your Worm Bin Building Project
There are lots of ways to advertise for an event and, unfortunately, no one way works consistently. Here are several options for you to choose from. The best outreach campaigns make use of several techniques and only you can know what is best for your project. Advertising options include:
- Creating and distributing door hangers to target a specific neighborhood where you would like to work
- Creating and distributing a press release to your local paper, radio stations and/or television stations (see the Resources section for information on how to write and distribute a press release).
- Creating flyers and placing them in public libraries, recreation centers, and walking trails
- Developing a web site or adding the information to an existing web site
- Running an advertisement in a local paper, or on radio stations and/or television stations
- Discussing the event at a targeted community association, church group, youth group, and/or service organization meeting
- Advertising your event on free on-line environmental calendars such as the Chesapeake Network
- Sending out an email to people you think would be interested and asking them to tell their friends as well
- Sending out a mass mailing to your targeted audience
Organizing a Worm Bin Construction and/or Distribution Day
It is not enough to have the construction materials for your worm bins ready for your event—some final preparations need to be made to make your construction/distribution day a success.
Construction
In advance of your event make sure that you have:
- Enough tools to share among participants without creating long waits
- Refreshments and snacks if possible or at least provide water
- Created and printed a sign-in sheet
- Created and printed enough directions for constructing the worm bins (with diagrams, if possible)
- Created a pre-constructed worm bin for demonstration purposes
- Done as much prep work for each worm bin as is possible—for example, put all the parts together with each worm bin or pre-cut the wood for each bin
- Called key volunteers and asked them to arrive early and be Team Leaders
- Organized stations or groups so that volunteers can be teamed up with Team Leaders to assemble their worm bins
- Put together an emergency medical kit and set up an emergency plan in case of an accident
- Made sure that bathroom facilities are available for volunteers
- Contacted local newspapers
- Designated a volunteer to take photos of the event
Distribution
It is not enough to give out the completed worm bins and assume that they are being used correctly. In advance of your event make sure to:
- Create and have on hand a working worm bin to demonstrate care
- Discuss the proper location of worm bins for a house or apartment
- Create and print instructions for installing the worm bins
Creating a Worm Bin
Below are instructions for two different worm bins. The first is a very simple bin that is ideal for those just getting started on vermiculture, apartment dwellers, or singles or couples without children. The second bin is larger and requires more effort to build. The general structure of the two bins is the same so you can take the general plan and build your own to match your needs.
If you are creating one of the more complex bins, you may consider completing some of the steps requiring cutting or drilling before the volunteers assemble the worm bin in order to save time and to minimize the number of people using potentially dangerous tools.
Materials
Bin 1 – Small, starter bin
- A shallow box (about 1’ deep, 1’ wide and 2’ long) made of dark colored plastic, wood or even Styrofoam
- A lid to fit the box (if it does not have one already)
Bin 2 – Larger, complex bin
- 1 four foot x eight foot x .5 inch sheet exterior plywood (Download a PDF of the cuts HERE)
- 1 fourteen foot construction grade 2” x 4″
- 1 sixteen foot construction grade 2″ x 4″
- 1 lb 4d galvanized nails
- 1/4 lb. 16d galvanized nails
- 2 Three inch door hinges
Tools
Bin 1 – Small, starter bin
- Hand Drill or Drill with ½” bit
Bin 2 – Larger, complex bin
- Tape measure
- Skill saw or rip hand saw
- Hammer
- Saw horses
- Long straight edge or chalk snap line
- Screwdriver or Drill with screwdriver drill bit
- Hand Drill or Drill with ½” bit
Building your Worm Bin
Bin 1 – Small, starter bin
In the case of the small starter bin, you are almost there! You have the bin, you just need to add ventilation and drain holes. Drill about ten air holes in the side and top of your bin for ventilation. Then drill four or five holes in the bottom of your bin for drainage. Your bin is now ready go!
Bin 2 – Larger, complex bin
Step 1 – Mark and Cut the Worm Bin Base Frame and Plywood
- Measure and cut plywood as indicated in diagram for the bottom and sides
- Cut the 12 foot 2”×4” into five pieces: two 39″, two 23″, and one 20″ long
- Cut four 1 foot lengths out of the 16 foot 2”×4”
- Take the remaining 12 foot 2”×4” and cut it into two 45″ pieces and two 20″ pieces
Step 2 – Nail the Base Frame and Plywood Together
Nail the 2”×4”s together on edge with two 16d nails at each joint as illustrated in the base frame diagram. Nail the plywood base piece onto the 2”×4” frame. Take each plywood side piece and place a one foot 2”×4” under each of it’s ends so that the 2”×4” is flush with the top and side edges of the plywood, and nail the boards into place. Nail the side pieces onto the base frame. To complete the box, nail the ends onto the base and sides. To reinforce the box make sure there is a nail staggered at least every 3 inches wherever plywood and 2”×4”s meet.
Step 3 – Build the Lid and Drill Air and Drain Holes
- Drill twelve ½” holes through the bottom of the box for drainage
- To build the lid, take the remaining two 45″ pieces of 2”×4” and two 20″ pieces of 2”×4” and lay them flat (short pieces on the inside as indicated in diagram) so that the plywood top is inset from the edges of the 2”×4” by 1-½” all the way around the perimeter. Nail the plywood onto the 2”×4” securely. Place the hinges on the backside of the box at both ends on the 2”×4”s, and on the under side of the 2”×4” lid frame, so that the lid will stand upright when opened.
Step 4 – Paint or Stain Your Worm Bin (if desired)
If you paint your box, just do the outside of the box as the paint or stain may be deadly to your worms!
Additional Suggestions
Drainage
All worm bins create some liquid. Place a metal or plastic tray under your bin to capture this liquid. The liquid can than be used as an excellent plant fertilizer.
Ventilation
Without enough air your worms can’t survive and, worse yet, you will have a smelly worm bin! If your bin produces odors, try drilling some additional holes in the sides for ventilation.
Preparing and Populating Your Worm Bin
Adding Bedding
The first step after creating your worm bin is to add bedding for the worms. Bedding holds moisture and provides a medium in which the worms can work and the garbage can be buried. It must be light and fluffy enough to allow air exchange. The worms will actually consume bedding as well as the kitchen vegetable wastes. Bedding can be made of shredded newspaper (just the black and white sections), shredded corrugated cardboard, peat moss, or leaf mold. Bedding must be well soaked in water and wrung out before adding to the bin. You want your bedding to be moist, but not soaked and fluffy, not packed. Fill your bin with bedding until it is about 2/3 full – around eight inches in depth. Finally add a handful of fine sand, soil, ground egg shells or other clean gritty material. This is necessary because worms don’t have teeth and they therefore need some other material in order to grind up their food.
Adding the Worms
You are now ready to add your worms. Remember, you can’t just use any species of worm–these are red worms or red wigglers (Eisenia foetida or Lumbricus rubellus). Some bait shops may sell them but you will probably have better luck looking at a garden supply catalog or online.
You need about a pound of worms for each pound of kitchen waste per week you would like to compost. These worms can double their populations every 90 days! As long as they have enough food and a healthy home, the worms you buy will expand their population to fill your bin, so you shouldn’t have to buy more unless you want to increase your worm composting operation very quickly. A good rule of thumb is that it takes approximately two pounds of earthworms to recycle a pound of food waste in one full day. Two pounds of worms requires about 4 cubic feet of space in your worm bin – so size your bin appropriately for the amount of food waste you produce!
Worms should be placed in the middle of the bedding – not on top. They like the cool, moist interior of the bedding and will not survive if exposed to the dry air for a long time!
Placing the Worm Bin
Now you need to find an appropriate place for your worm bin. In the Potomac basin, worm bins should not be left outdoors. Red worms cannot survive the freezing temperatures of winter and they do not process food well at the high temperatures that occur in summer months. Instead, place your bin in a place with moderate temperatures between 55 degrees and 77 degrees. Some people keep them in their basements, next to their hot water heaters, or in their garages. In apartments they can be stored under the kitchen sink or in a cabinet.
Maintaining Your Worm Bin
Adding Food Scraps
Feeding worms is the fun part of vermicomposting. Since red worms eat up to their own weight in food every day, a box with one pound of worms will easily handle five pounds of food per week (but do not overfeed the box—stop for a week or more if the worms cannot keep up with your supply). Feel free to include almost all fruits and vegetables, such as citrus and melon rinds, wilted lettuce, potato and carrot peelings, etc. You can also add coffee grounds and filters, tea leaves and bags, crushed egg shells, and house plant prunings. Never add meat, fish, dairy products or oils.
Add food by lifting up the bedding, depositing the scraps, and always covering it with the damp bedding. This will prevent any odors or fruit flies. Try to place food in alternate areas of the box. You shouldn’t need to add any additional water—but check every few weeks to make sure the bedding does not dry out. If the bedding gets soggy, tear up more paper and mix it in dry with the other bedding.
After about four-six months, the worm population will have grown remarkably and most of the food scraps and older bedding will have been converted into worm castings or vermicompost.
Harvesting the Compost Tea
If your worm bin has holes in the bottom to allow for liquids to flow through, you will occasionally need to harvest the compost tea from the tray that you keep under your worm bin. The tea can be used as a liquid fertilizer for your plants.
Harvesting the Compost
After a few months, most of your bedding will have been converted to vermicompost and you will need to add new bedding and remove the compost material. The most convenient method of performing this procedure is to move the compost to one side of the bin and add new bedding and garbage to the other. Allow about one month for the worms to migrate to the fresh material. At this point the compost may be removed and replaced with new bedding.
Another method for harvesting the compost is to place the compost on some plastic sheeting in small piles and expose the piles to the sun or bright lights. Because the worms don’t like light, they will move to the bottom of their pile. After about a quarter of an hour you can remove the upper inch the compost from each pile. Again, let the worms move to the bottom of the pile. At the end of this process you will have separated your worms from your compost. You can then add your worms back into your compost bin with new bedding and use your compost as you see fit!
Typical Worm Bin Problems and their Solutions
Odors
If your bin is receiving more food than the worms can eat, the food waste will begin to rot and cause odors. If you notice that your bin has begun to smell, stop adding the waste until the worms have a chance to catch up.
Another cause of foul odors is too much moisture. If it looks like your bin is collecting moisture, fluff up the bedding to add air, add some dry bedding, and check the drainage holes. As a general rule of thumb, keep the bedding material moist, but never soggy. Make sure the food waste is buried properly in the bedding.
If neither of these problems seems to be the case with your bin, it may be that your bin is too acidic. Cut back on the amount of acidic food you are adding to your bin (foods such as coffee and citrus).
Fruit Flies
Fruit flies generally appear if the food waste is exposed. Make sure when adding food to your bin that you put it inside the bedding, not on top. Additionally, make sure to keep the top of your worm bin covered. Fruit flies can also appear if you are adding more food than your worms can handle. If you think this is the case, cut back on the amount of food you add until the worms can catch up.
It is also possible that if your worm bin has holes in the bottom, insects may be attracted to the compost tea that you are collecting. If you find this is the case, you can plug the holes in the bottom of your bin as long as you keep an eye on the level of moisture in your bin. If the bin is too wet, add some dry bedding to soak up the moisture.
Resources
- Sample Liability Waiver
- Sample Press Release
- Sample Sponsor Letter
- The Worm Digest–a book on all things vermiculture
- Vermicomposting – A Guide to Getting Started (Ava’s Flowers)
**Have you completed a project listed on W.A.T.E.R.? Send us a photo and we’ll feature your group in our Newsletter and Facebook page!**