Build a Rain Barrel
Interstate Commission on the Potomac River Basin
What is a Rain Barrel?
A rain barrel collects water and stores it for when you need it most—during periods of drought—to water plants, wash your car, or to top a swimming pool. It provides an ample supply of free ‘soft water’ to homeowners, containing no chlorine, lime or calcium making it ideal for gardens, flowerpots, and car or window washing. Using a rain barrel diverts water from storm drains, decreasing the impact of runoff to streams and the Chesapeake Bay. Therefore, a rain barrel is an easy way for you to “Save the Bay” and have a consistent supply of clean, fresh water for outdoor use, FREE!
Why Should I Use a Rain Barrel?
Lawn and garden watering make up nearly 40 percent of the typical total household water use during the summer. A rain barrel can save most homeowners about 1,300 gallons 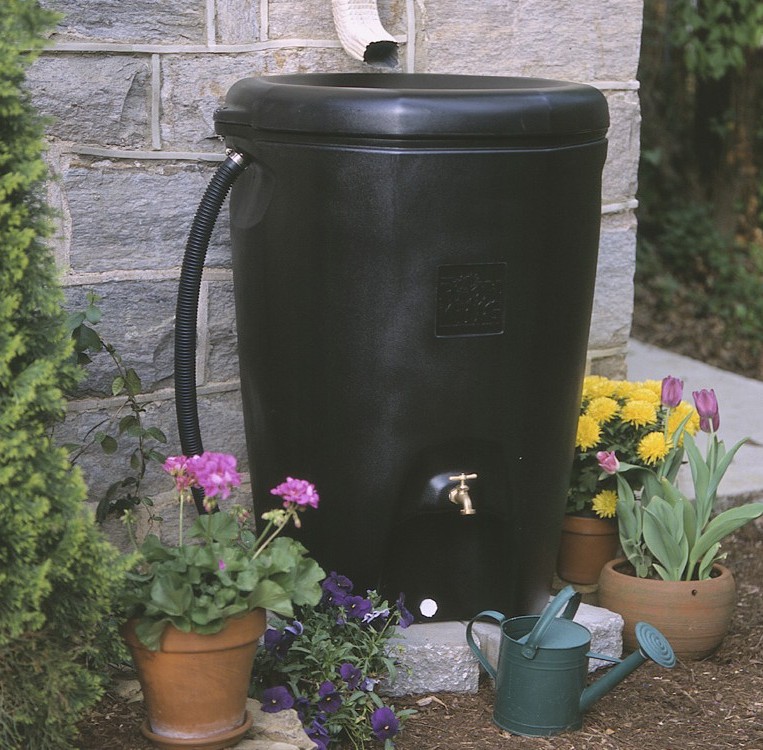
of water during the peak summer months. Saving water not only helps protect the environment, it saves you money and energy (decreased demand from treated tap water). Furthermore, the rain captured in rain barrels can be a source of chemically untreated ‘soft water’ for gardens and compost, free of most sediment and dissolved salts.Rain barrels are also used to reduce runoff volume and delay and reduce the peak runoff flow rates. By storing and diverting rainwater runoff from impervious areas such as roofs, these devices reduce the undesirable impacts of runoff that would otherwise flow swiftly into receiving waters and contribute to flooding and erosion problems. In short, rain barrels are a low-cost way to reduce runoff, reduce household water usage, and save you money while improving the quality of streams and neighborhoods.
Developing Your Goals and Budget
Before charging ahead with a rain barrel project it is crucial to determine the budget for your work and set your goals. Let’s start with determining your budget which will help determine your goals.
Budget
Rain barrels come in two varieties—home-built or purchased. It goes without saying that store-bought rain barrels are more expensive. Whatever route you choose, a rain barrel requires more than just the barrel itself to work. Below is a cost comparison between purchasing a rain barrel and building it yourself.
| Purchased Rain Barrel | Created Rain Barrel |
| Rain Barrel with sealed top $120 Overflow Kit/Runoff pipe $35 Concrete pad or cinder blocks $10 Downspout Diverter $18 Soaker Hose $21 (optional) Linking Kit $12 (optional) Spigot, if not supplied $5 (optional) Additional Guttering $5 (optional)TOTAL ESTIMATED COST: $226 |
Plastic food-grade barrel $5 1 piece of window screen $1 1 basket like those used in garden ponds and pool skimmers $5 1 – 5’ – 1 ¼” sump pump line $3 1 – ½” male threaded barbed fitting $2 1 – 1 ¼” female barbed fitting $2 1 – 1 ¼” male threaded coupling $2 1 hose coupler fits 5/8” and ¾” garden hose $3 1 – shut-off valve with male and female ends $3 1 Garden hose (~ 5’ per barrel) $5 1 – hose clamp fitting 3/8” to ¾” hose $2 1 – hose clamp fitting ¾” to 1 1/8” hose $2 1 ¾-in. pipe thread $2 1 roll Teflon tape $2 1 tube silicon caulk $2 Concrete pad or cinder blocks $10 Downspout Diverter $18 Soaker Hose $21 (optional) Linking Kit $12 (optional) Spigot, if not supplied $5 (optional) Additional Guttering $5 (optional)TOTAL ESTIMATED COST: $119 |
It is important to note that in both cases, the price drops as more rain barrels are purchased, however a good rule of thumb is that a pre-made rain barrel will be about twice the price. If you are going to build your own rain barrels, you must also factor in the price of the tools needed. The tools needed to build and install a rain barrel include a drill and drill bits, a hacksaw, a screwdriver or rivet gun, and an adjustable wrench.
Financing
The two major ways of financing a rain barrel project are to have individual purchasers pay for their rain barrel or to seek out funding through grants and donations. Some rain barrel projects are funded through a combination of the two methods. Whichever method you choose will affect your work plan.
Goals
You may be building or purchasing rain barrels just for the members of your organization, or for an individual structure, or you may be targeting a neighborhood with high storm water runoff, or targeting a specific audience such as schools in your watershed. Whatever the case, you will want to write out your specific goals and let them guide your work plan. Some example goals:
- Reduce impacts of storm water runoff for a sub-watershed of your local stream
- Enhance community awareness of storm water runoff and non-point source pollution
- Foster environmental stewardship and an interest in science by students, teachers, administrators, and members of the community.
Keep in mind that your goals and your audience may affect whether you purchase or build your own rain barrels. Building your own rain barrel helps develop a sense of pride and ownership, however pre-made rain barrels are easier to maintain. It may not be appropriate, for example, for young students to build their own rain barrel because of the use of sharp tools. On the other hand, if your target audience is very motivated, building your own rain barrel may work well. For a rain barrel to work properly three things must occur:
- It must be built properly
- It must be installed properly
- It must be maintained properly
Depending on what your goals are, building or purchasing the rain barrels might just be the first step of your work and not the end point!
Creating a Timeline
Your timeline will vary depending on how you have set up your project. For example, if you are financing your project through individual purchases, your first step is to canvas your targeted area to find interested homeowners and collect their money. On the other hand, if you have funded your project through a grant, your first step is to order the rain barrels. Below is a sample timeline for a project funded through a grant where individua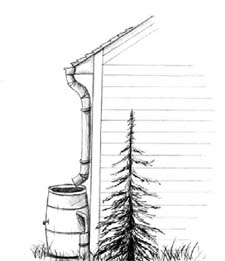 ls will be building their own barrels:
- Determine the target area for the rain barrels
- Order rain barrels from supplier (it can take some time for a company to use the number of food-grade barrels that you need so call well in advance)
- Arrange for a location to store and build the rain barrels
- Arrange for barrels to be delivered or to pick up the barrels (NOTE: this may be an additional cost)
- Purchase other needed supplies – tools and rain barrel parts
- Advertise the rain barrel construction day through as many outlets as possible
- Create and print owner’s manual/educational materials
- Host rain barrel construction day
- Arrange for delivery of rain barrels to recipients (if they will not be taking them home themselves)
- Arrange site visits to make sure that rain barrels are properly installed and/or to help install them
- Call rain barrel owners to remind them to drain their rain barrels after rainstorms for the first month of ownership to instill the habit of emptying them
Locating and Sizing your Rain Barrels
Location
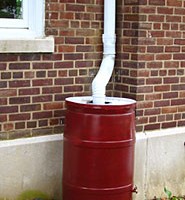
Rain barrels can be placed just about 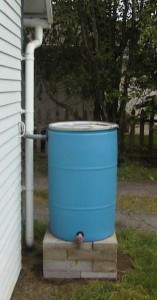 anywhere there is level ground! They do not take up a lot of space—in general they have a footprint of about four square feet. Logically, most rain barrels are placed under existing downspouts from gutters, however this is not a requirement. If you wish, a rain barrel can be placed away from your home as long as there is a way of conducting water from your roof to the rain barrel. The only other consideration in placing your rain barrel is locating them so that they can be elevated. For a rain barrel to drain well, it needs to be elevated. This is both so that the water will get an extra push from gravity and so that you can place a watering can or bucket beneath the spigot.
Size
In order to determine the size and/or number of rain barrels that are needed at a particular site, you need to know the size of your roof or the portion of roof that will drain to the rain barrel. Additionally, you must use your own judgment about how often it is acceptable for your rain barrel to overflow. A good rule of thumb for determining the amount of runoff from your roof to your rain barrel is that a one-inch rainstorm on a 1,000 square foot roof will produce about 625 gallons of runoff – or about 63 gallons per every 100 square feet. The average rain barrel holds about 60 gallons of water. Therefore if your roof were only 100 square feet in size one rain barrel would probably be acceptable to capture your home’s runoff from most storms. Most of us do not have 100 square foot roofs, however it is important to note that most rainstorms in the mid-Atlantic area drop less than one inch of rainfall. Once you have estimated the size of the roof area determine how much water you would like to store in your rain barrel(s). If you decide that a typical 60 gallon rain barrel is not sufficient, there are larger versions that are available or you can link two or more rain barrels together in a series.
Advertising your Rain Barrel Project
There are lots of ways to advertise for an event and, 
unfortunately, no one way works consistently. Here are several options for you to choose from. The best outreach campaigns make use of several techniques and only you can know what is best for your project. Advertising options include:
- Creating and distributing door hangers to target a specific neighborhood where you would like to work
- Creating and distributing a press release to your local paper, radio stations and/or television stations (see the Resources section for information on how to write and distribute a press release)
- Creating flyers and placing them in public libraries, recreation centers, and walking trails
- Developing a web site or social media campaign
- Running an advertisement in a local paper, or on radio stations and/or television stations
- Discussing the event at a targeted community association, church group, youth group, and/or service organization meeting
- Advertising your event on free on-line environmental calendars such as the Chesapeake Network
- Sending out an email to people you think would be interested and asking them to tell their friends as well
- Sending out a mass mailing to your targeted audience
Organizing a Rain Barrel Construction and/or Distribution Day
It is not enough to have the construction materials or purchased rain barrels ready for your event—some final preparations need to be made to make your construction/distribution day a success.
Construction
In advance of your event make sure that you have:
- Enough tools to share among participants without creating long waits
- Refreshments and snacks if possible or at least provide water
- Created and printed a sign in sheet
- Created and printed enough directions for constructing the rain barrels (with diagrams if possible)
- Created a pre-constructed rain barrel for demonstration purposes
- Done as much prep work for each barrel as is possible—for example, put all the parts together with each rain barrel
- Called key volunteers and asked them to arrive early and be Team Leaders
- Organized stations or groups so that volunteers can be teamed up with Team Leaders to assemble their rain barrels
- Put together an emergency medical kit and set up an emergency plan in case of an accident
- Made sure that bathroom facilities are available for volunteers

- Made sure to have access to water hose if possible
- Contacted local newspapers
- Designated a volunteer to take photos of the event
Distribution
It is not enough to give out the rain barrels and assume that they have been installed correctly. In advance of your distribution make sure to:
- Create or set aside a rain barrel to demonstrate proper installation
- Find a downspout at or near your distribution site where you can demonstrate installation
- Prepare the downspout so that the demonstration will go quickly and smoothly
- Recruit volunteers to visit homes to help install the rain barrel and/or to make sure that rain barrels are properly installed
Constructing Your Rain Barrels
There are several steps to constructing a rain barrel from scratch. Ideally, the first three steps below would be completed before the volunteers assemble the rain barrels in order to save time and to minimize the number of people using potentially dangerous tools.
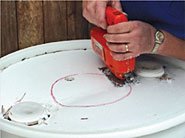
Step 1 – Mark and Cut the hole for the screen and mesh basket on the top of the rain barrel.
- Using the basket as a template for size, mark a circle at the center of the top of the drum (Locating the rainwater inlet in the center of the barrel allows the barrel to be pivoted without changing the position of the downspout).
- Pre-drill small hole using 1⁄2” spade bit. This hole is the starting point of your jigsaw to cut the large hole. Be sure to drill the hole inside the line marking the edge of the basket or screen.
- Use the jigsaw to cut out your screen or basket hole. Make sure not to make the hole too big–you want the flange of the basket to fit securely on the top of the barrel without falling in.
Step 2 – Mark and Cut the Upper Drain Hole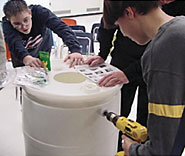
- Mark hole according to where you want the overflow to be located in relationship to the lower drain (they are often 90 degrees from the lower drain).
- Use a 1 5/8” hole saw to cut out the overflow hole.
Step 3 – Mark and Cut the Lower Drain Hole
- Mark the location of your lower drain hole based on placement of your rain barrel next to a building. They are normally placed about 1 inch above the bottom of the barrel where the curvature along the bottom rim ends and the barrel side begins to rise toward the top.
- Use a 3⁄4” hole saw to cut out the lower drain hole.
- Thread the hole with a 3⁄4” tap (fitting may be put in without threading first but may be difficult).
- Wrap the threads of the 1⁄2” PVC male adapter tightly w/Teflon tape and coat the threads of the coupler with a waterproof sealant. Screw the adapter into the newly threaded hole.
- Screw the coated adapter into the hole and let it sit and dry for 24 hours.
Step 4 – Preparing Basket and Screen for the Top Hole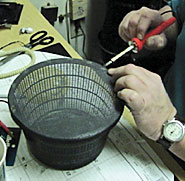
- If using a basket, cut some fiberglass window screen material to fit the top of the basket
- Affix the screen to the lip of the basket using PVC glue
- Place the basket in the pre-cut hole
Step 5 – Inserting the Coupling and Fitting into Top Hole
- Put the large (11⁄4 inch) threaded male coupling inside the barrel with the threads through the hole
- From the outside, screw the large female (11⁄4 inch) barbed fitting onto the threaded coupling
- Use silicone on the threads
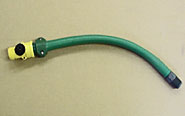
- Attach 5’ foot section of drain hose to upper fitting
Step 6 – Constructing the Shutoff Valve Assembly
- Push hose into the green hose coupler and tighten screws
- Screw shut-off valve onto the hose coupler
- Wrap the threads of the shut-off valve tightly w/Teflon tape and coat the threads of the valve with a waterproof sealant.
- Screw the coated shut-off valve into the threaded hole and let it sit and dry for 24 hours.
Installing Your Rain Barrel
The installation process is just as important as the construction process. A barrel can be solidly constructed, but it will not work properly if it is not installed properly. There are two parts to installing a barrel – 1) setting up the barrel and 2) modifying the downspout.
Step 1 – Setting up the Barrel
- Make sure that the ground is level where the barrel will be placed. Often a cement tile is helpful to both level the barrel and distribute its weight.
- Elevate the rain barrel. Rain barrels are designed to take advantage of gravity. Water will flow from the lower hose when the hose nozzle is below the barrel. Therefore, place the barrel on cinder blocks about 15 inches off the ground.
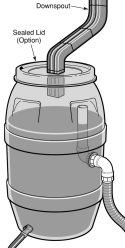
Step 2 – Modifying the Downspout
- Cut the existing downspout with a hacksaw.
- Connect the newly cut end piece to the existing downspout using a gutter elbow. The end of the downspout should be placed on top of the barrel so that the rainwater can flow into the barrel.
- Direct the overflow tube at the top of your barrel so that it drains into a pervious area in your yard.
Optional Modifications to your Rain Barrel
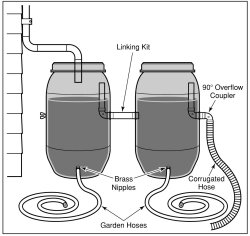
- It is possible to connect multiple rain barrels together using the overflow tube as a connection from one barrel to the next in a series.
- The lower drain tube can be used to connect a soaker hose so that rainfall collected in the barrel will water a selected area slowly over time.
Maintaining Your Rain Barrels
Maintaining a rain barrel is easy and inexpensive! To keep your rain barrel working properly, the most important thing to remember is to EMPTY THE RAIN BARREL AFTER EVERY RAINSTORM!!! If you do not drain your full rain barrel, it cannot collect more water during the next storm!
In addition to draining the rain barrels after storms, rain barrels require some additional maintenance. Rain barrels and their connections should be inspected twice a year (usually in the spring and fall) and damaged items should either repaired or replaced as needed. Follow these simple steps to ensure your rain barrel keeps working well:
- Inspect the roof to ensure that no particulate matter or other parts of the roof are entering the gutter and downspout to the rain barrel.
- Examine the gutters to ensure that no leaks or obstructions are occurring.
- Look at the downspouts and the entrance to the rain barrel also to assure that no leaks or obstructions are occurring.
- Check out the rain barrel for potential leaks, including the barrel top and seal.
- Look at the runoff/overflow pipe to ensure that overflow is draining in non-erosive manner.
- Test the spigot to ensure that it is functioning correctly.
- Inspect any accessories, such as rain diverters, soaker hoses, linking kits, or additional guttering.
Winterize your rain barrel! Most of us live in climates that experience a fair amount freezing in the wintertime, which can wreak havoc on a rain barrel. If a rain barrel fills and then freezes, the ice can expand and crack the rain barrel. As winter and freezing temperatures approach, either disconnect your rain barrel from your downspout or open the lowest spigot on the barrel so that water can flow through.